
2 minutes read
July 24, 2026
Published: September 05, 2024
How to Create and Set Up Meta Pixel (formerly Facebook Pixel) on Your Shop Built with Marketsy.ai
In this article, you will learn how to create and connect Meta Pixel (form. Facebook Pixel) to your store. You will connect it in a manual way, but no worries, it’s a pretty straightforward and well-described process.
Creation of a Meta Pixel
The most relevant article about setting up and installing a Meta Pixel is published by Meta here. If the link doesn’t work, let us know and we will look for a fresher one.
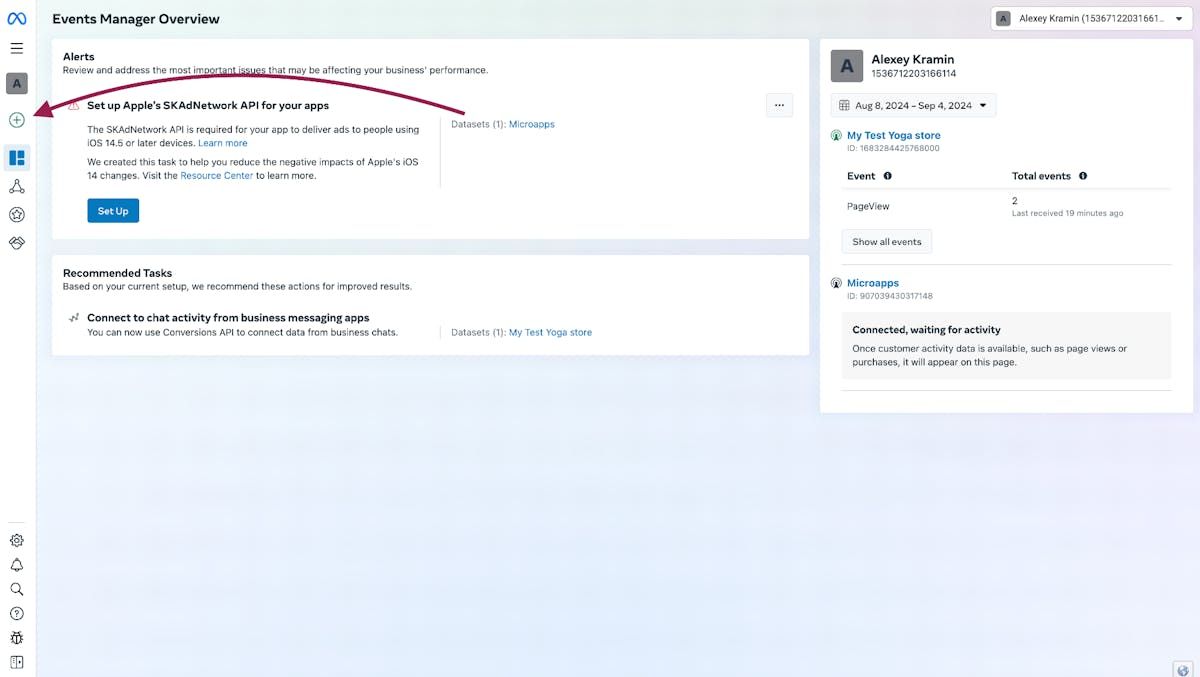
The process of setting up done by us is on the screenshots below.
- Go to Meta Events Manager
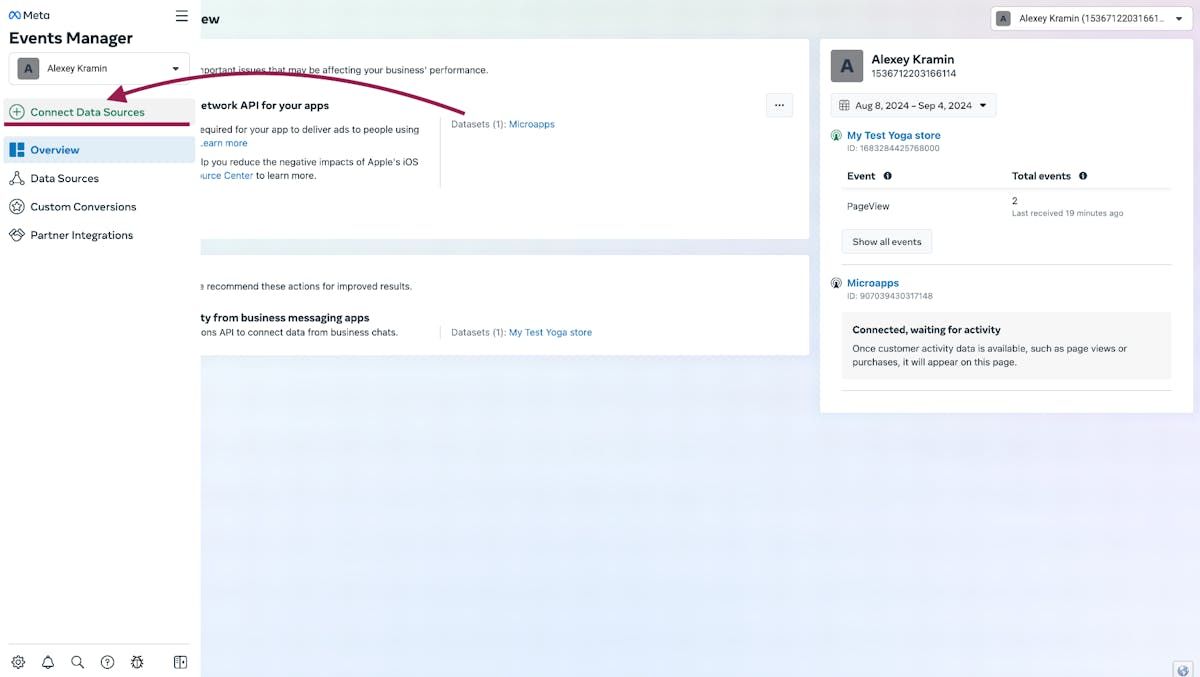
-
Click “Connect New Data Source“
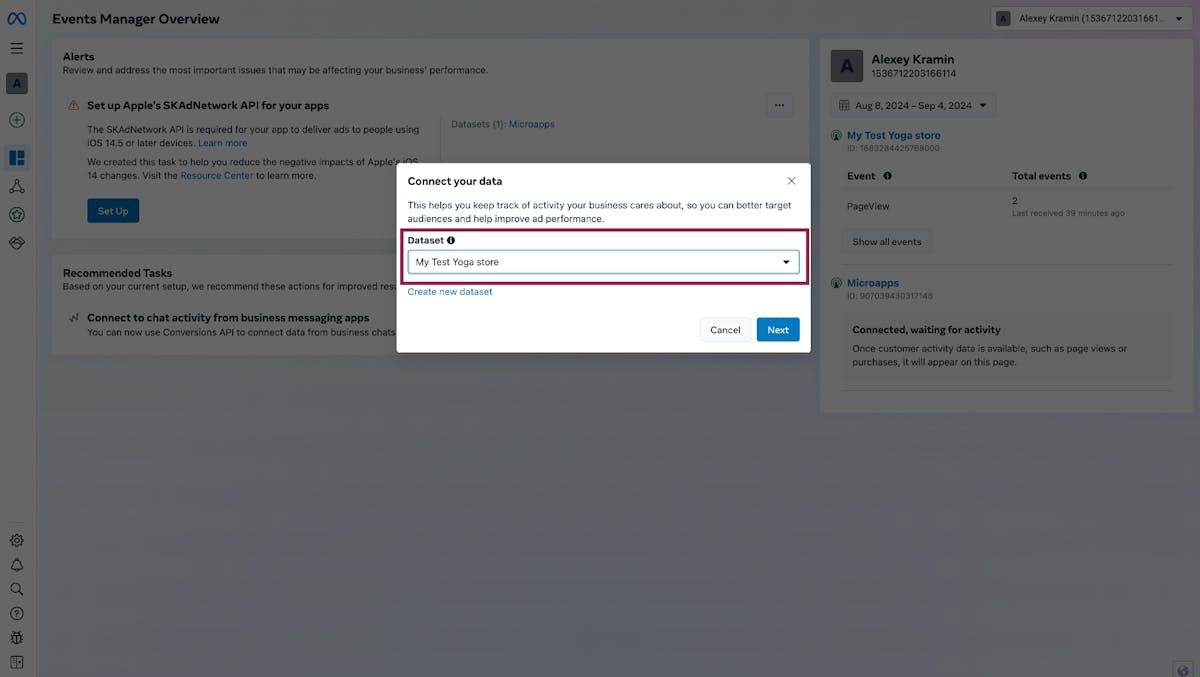
-
Create or select your dataset
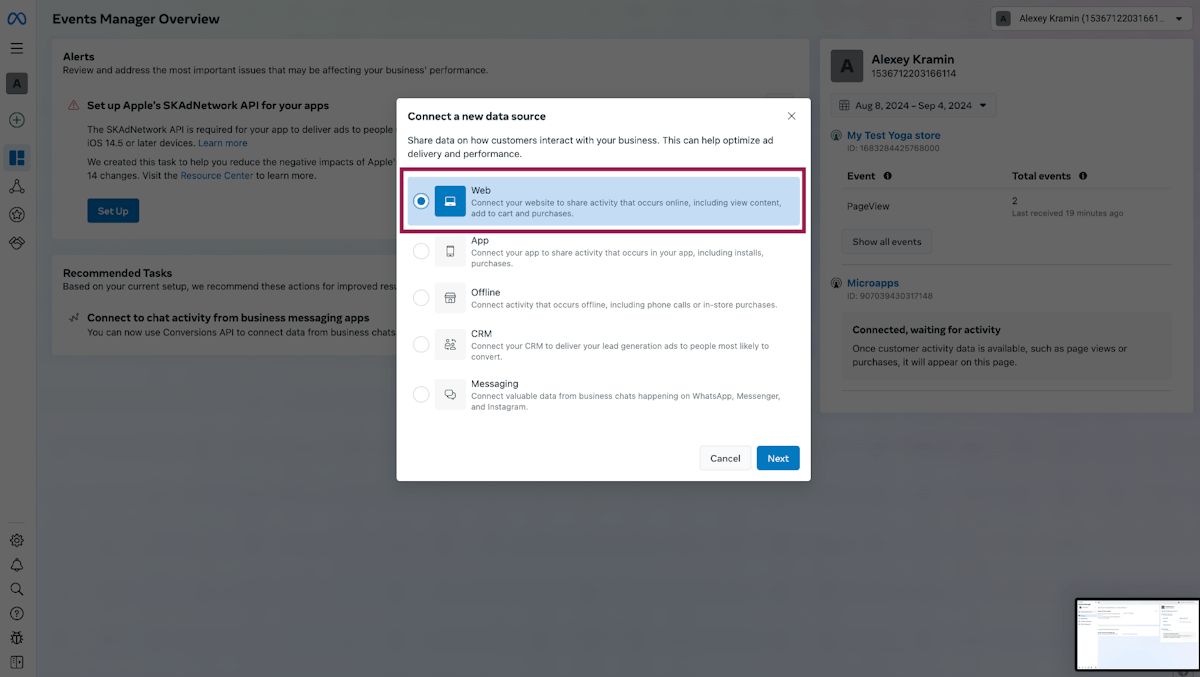
-
Choose “Web“
-
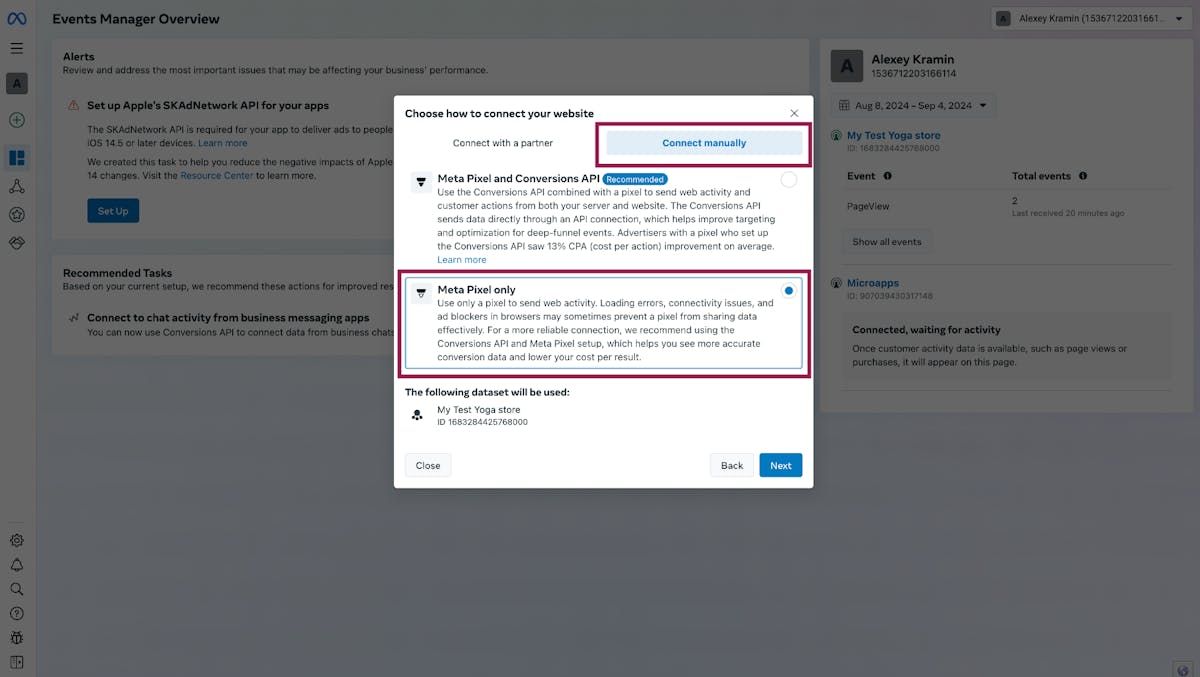
Click “Manually“ → “Meta Pixel Only“. We DO NOT SUPPORT Conversions API at the moment, but you can ask about it. If we have enough requests, we can prioritise this task.
-
⚠️ ATTENTION ⚠️. Click “See instructions“ in the next step. I have no idea how to see this instruction any other way
Setting up of a Meta Pixel
-
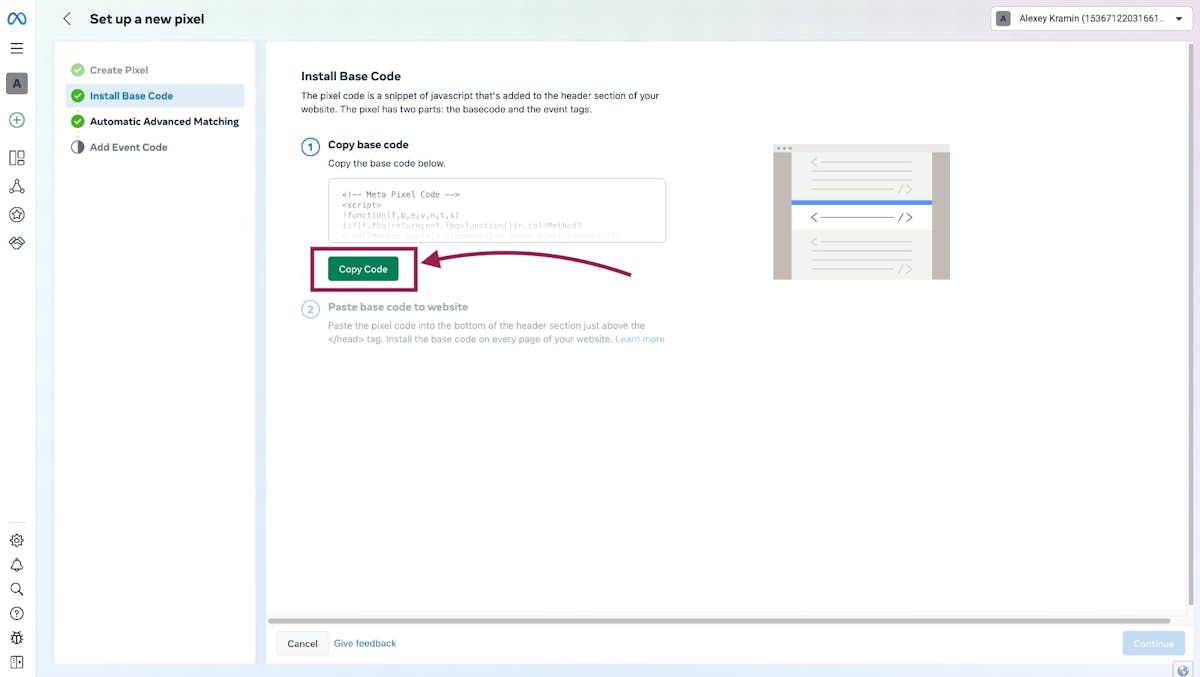
Then copy code from the set up instructions
-
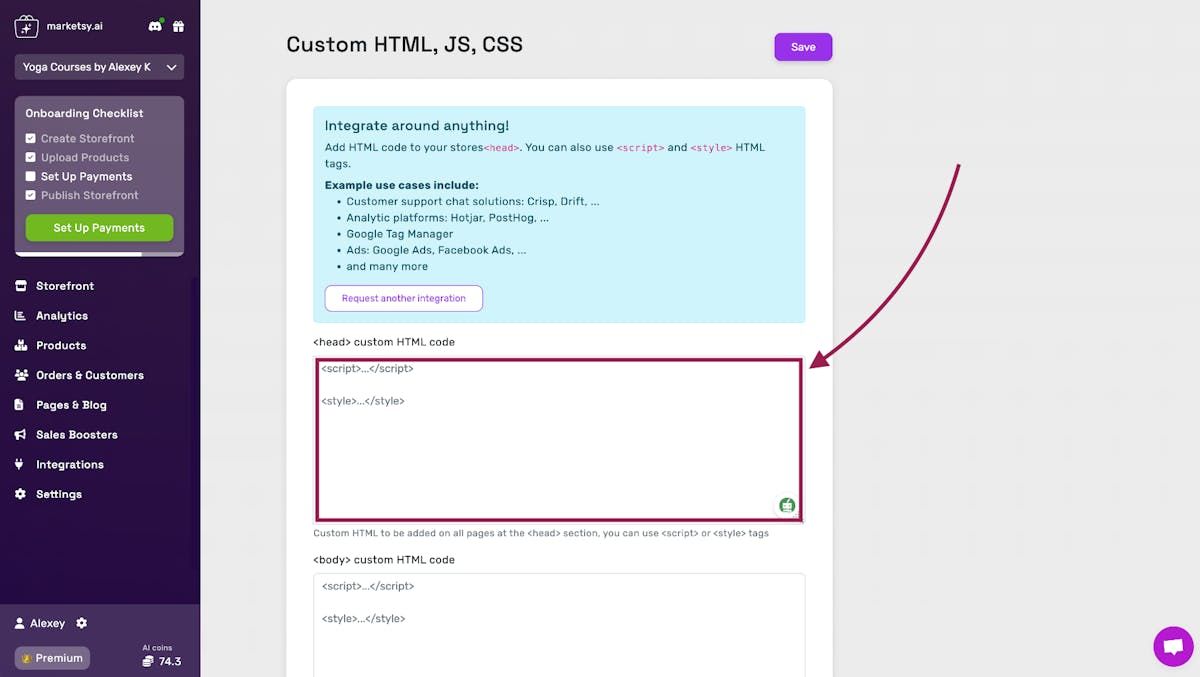
Go to the Custom HTML page setting of your store. A direct link to this page is here.
-
Paste your code into the <head> custom HTML code section
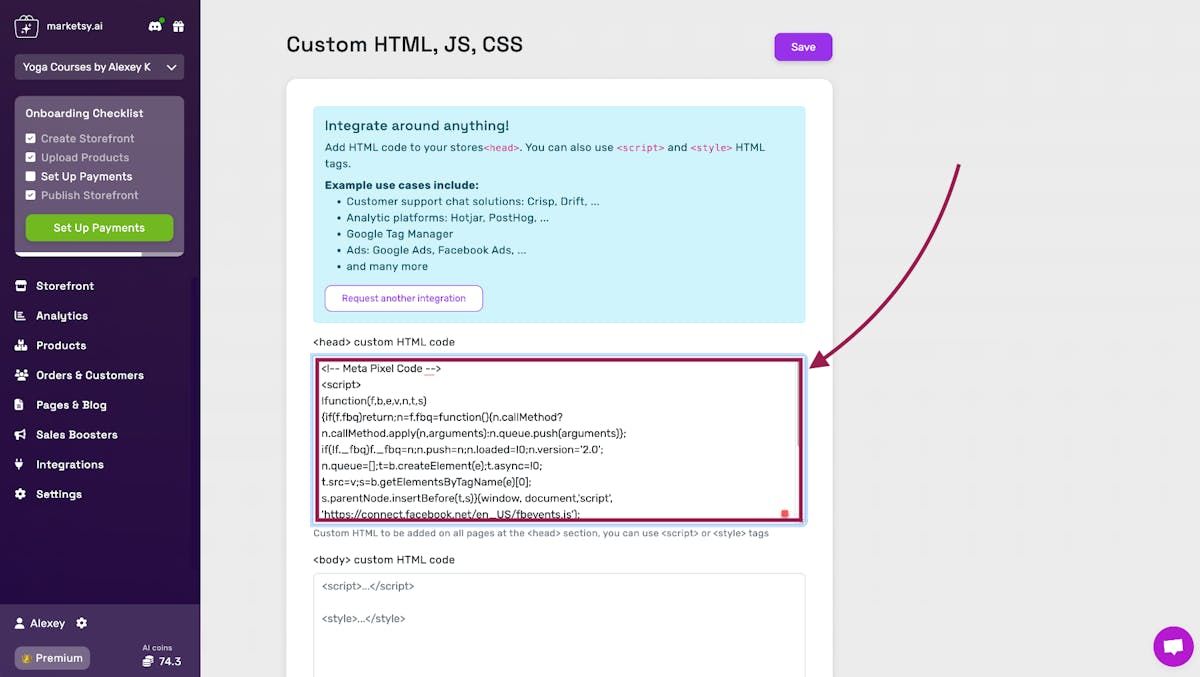
- And Save
-
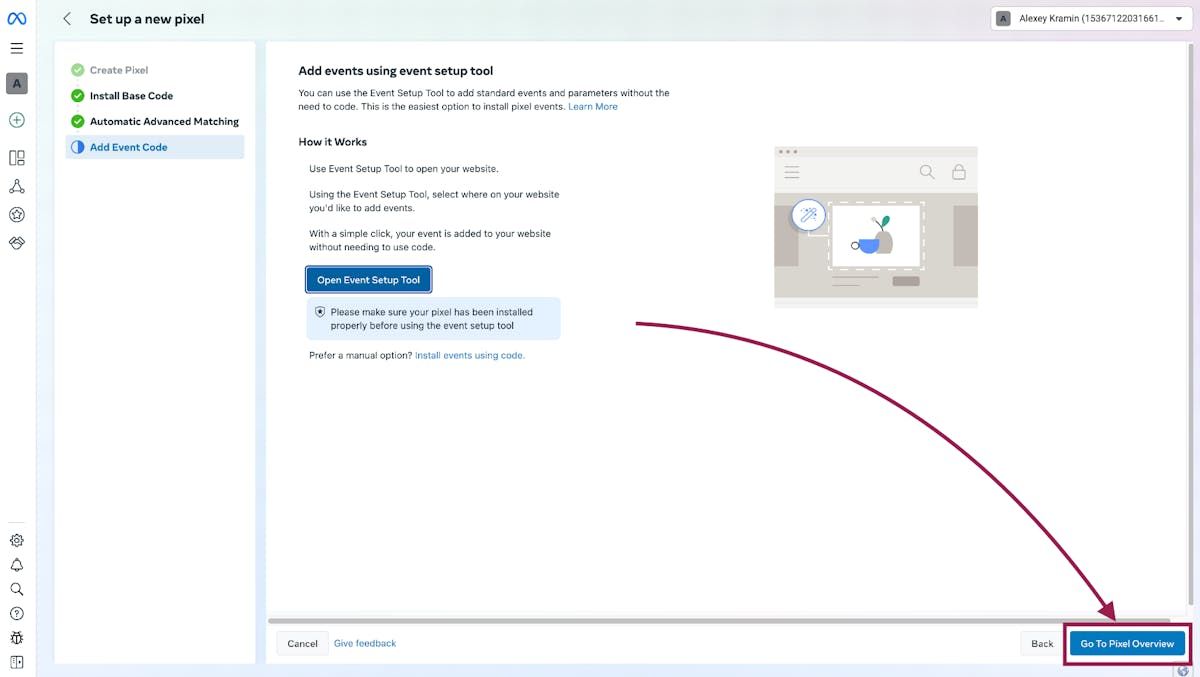
After that, you can “Go To Pixel Overview”. And perform a few actions on your website: add anything to cart, place a test order, just walk around pages.
-
In a couple of minutes, you will see new events in your Pixel dashboard.
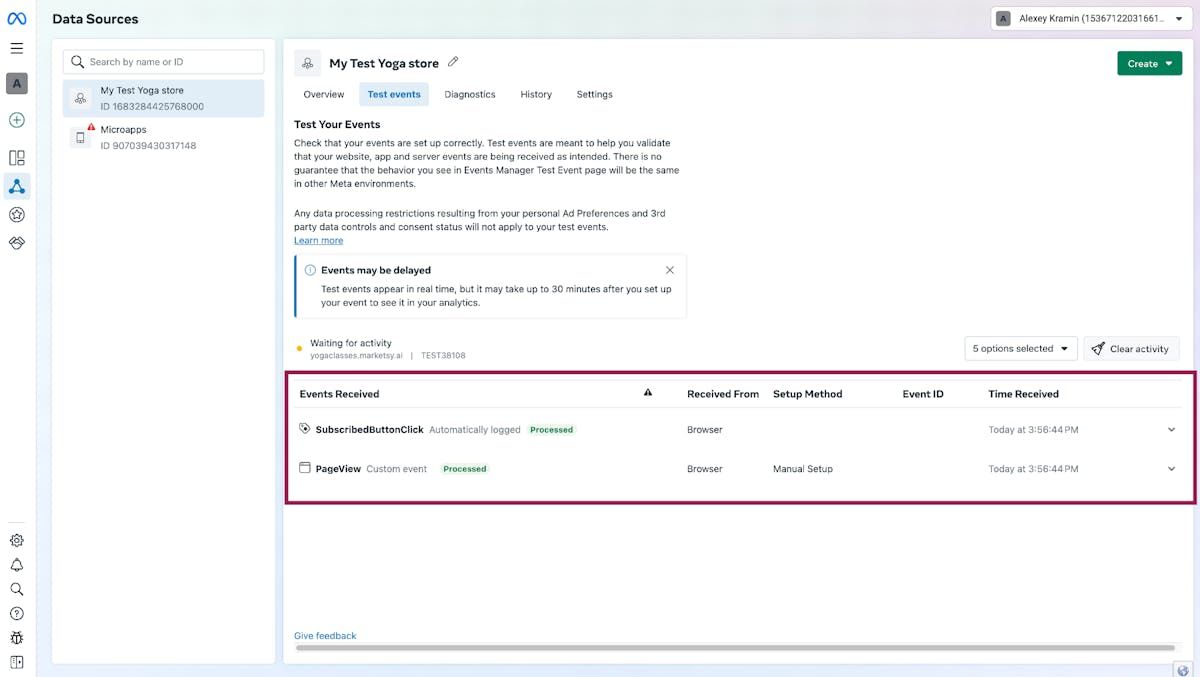
Here, the integration of Meta Pixel with your store built on Marketsy.ai is complete.
Talk to the founder
Add a New Sales Channel
Launch a branded storefront!
Ideal for selling:
- • Digital downloads
- • Courses & tutorials
- • Visual & audio assets
- • Game credits or licenses
- • Private memberships
Spin up in a few minutes! 🚀